Monday, July 27, 2020

A-MUSE-ing Rocks


During July, we built on a student interest: rocks!  Each child at Harmony's House has a rock collection at home, so we brought that interest alive in the classroom as well.  One small group activity was to use magnifying glasses to study an assortment of rocks.


We talked about things that we noticed and recorded our observations for parents to appreciate.  Some of our rocks were geodes, cooling slowly after having lots of heat and pressure.  This made crystals form.  Some of our rocks were full of bubbles (holes), made by volcanoes.


Other rock samples were magnetic, and we found one other rock besides hematite that was also magnetic.  We found rocks that were flat (sandstone), rough (desert rose and scoria), and smooth (apache tears and agate).


Some of our rocks were special because they were fossils!  Fossils are rocks that are remnants of something that was once alive such as a plant or animal.  We know about dinosaurs because of fossils!  So we naturally played with dinosaurs too.


Our Explore Table was filled with kinetic sand, rocks, dinosaurs, and aquarium plants.  The wonderful thing about the kinetic sand was that it would show us how dinosaurs made tracks that could be preserved.  We could also pretend that a dinosaur was hatching from an egg.  Finally, we could bury a dinosaur and see how the body left prints behind.  Remnants of bones, eggs, tracks, and even dinosaur poop helps us learn about how dinosaurs lived long ago.


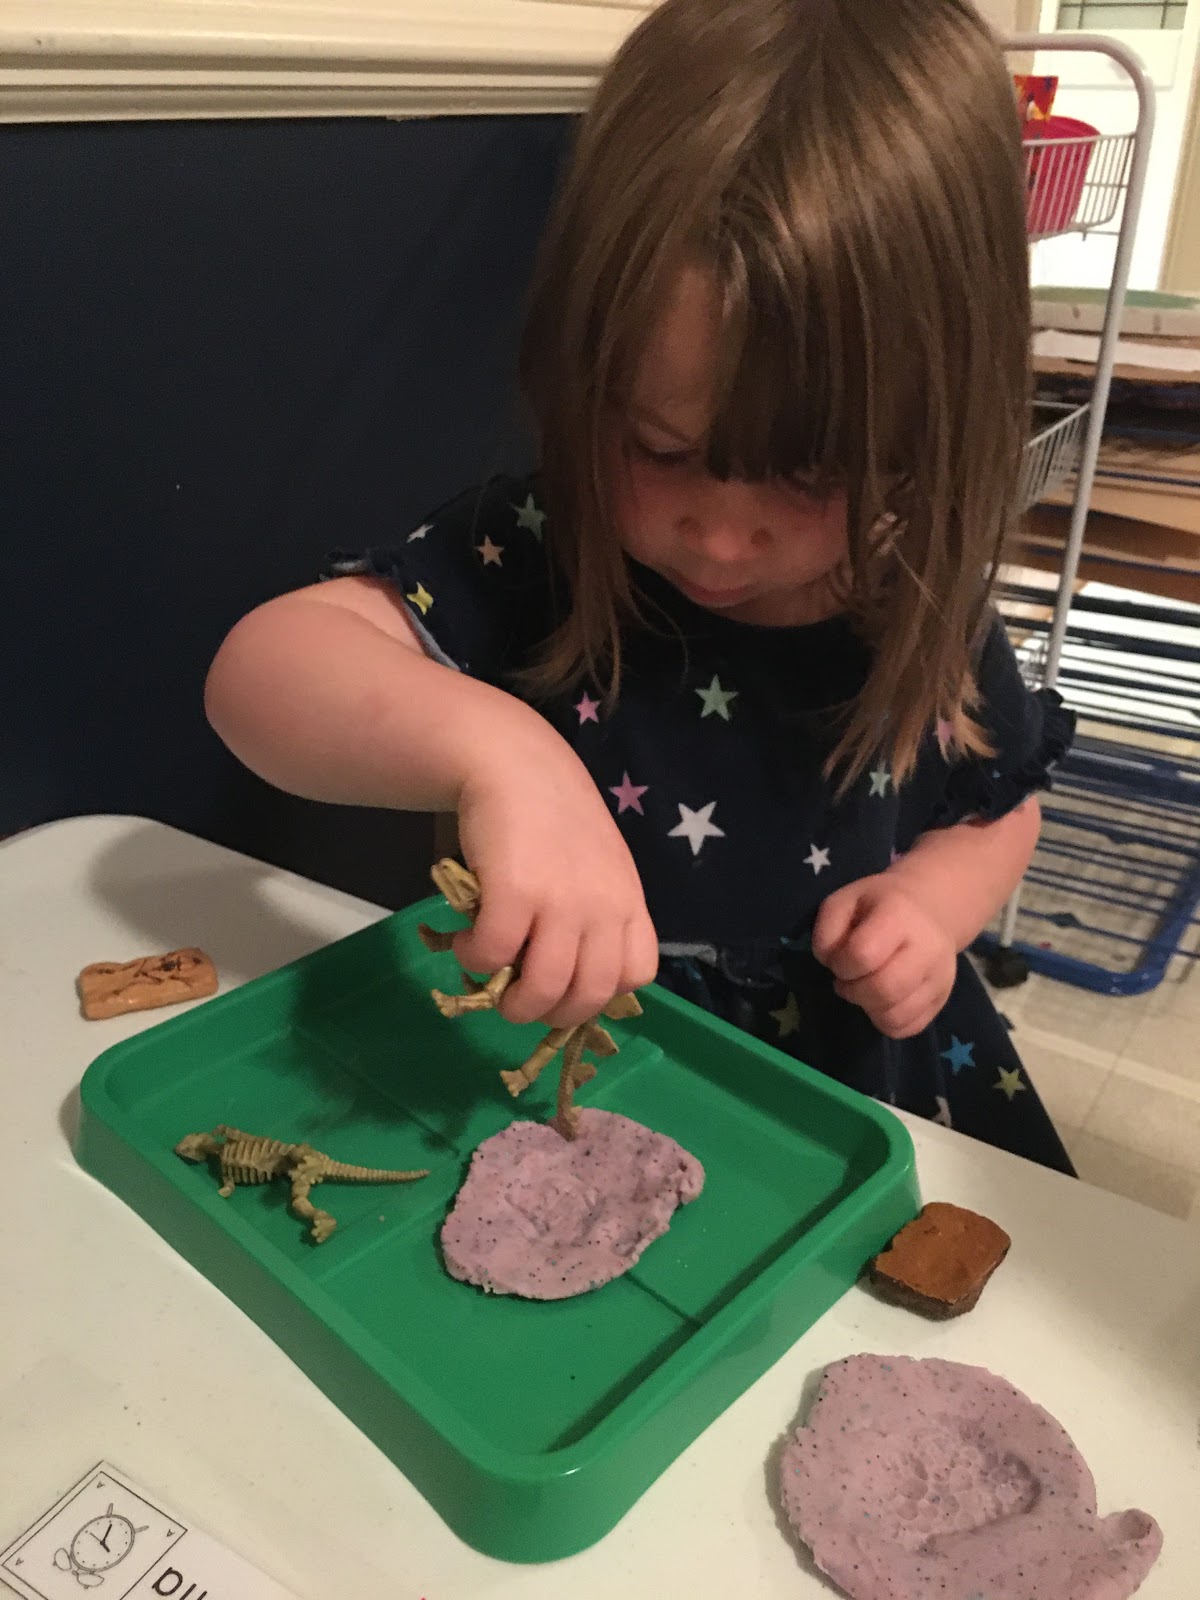
In the Art Area, we used toy dinosaur skeletons to again talk about fossils... but we also used them to see whether the dinosaur walked on two legs or four.  The prints turned out great!


No childhood can be considered complete without rocks and dinosaurs.  What a fun unit this has been for our miniature geologists!

Saturday, July 18, 2020

Tips for Tie-Dyeing with Preschoolers


Summer isn't summer at Harmony's House without making new tie-dye t-shirts.  :)  We did this project inside this year with four children ages 20 months to 3 1/2 years.  It sounds like a recipe for disaster, or at least a huge mess!  But it wasn't.  Ms. Harmony did a few things to prepare for the activity that made this potential mess into an easy-breezy-totally-fun project!


Tip 1:  cover the entire table with trash bags or cheap dollar tree table clothes, including using packing tape to close the seams of overlapping edges.

Tip 2: show the children options for the t-shirt designs in advance and ask them to choose one that they like: swirl, stripes, bulls-eye, etc.

Tip 3:  Prep the shirts according to the children's preference.  Do a cold rinse and spin in the washing machine.  Scrunch, roll, shape, etc. the shirt and apply the rubber bands.  Place the damp shirt in a small ziplock bag with the child's name on it.


Tip 4:  Choose three or four colors of dye and make them up before the activity.  Estimate the amount of dye you will need, but have an extra bottle or two on hand just in case you run out mid-project.

Tip 5: When leading the activity, only work on one shirt at a time.  Usually the other children enjoy watching the dyeing process, but they can go play elsewhere until it is their turn to dye their shirt.

Tip 6:  Lay a small sheet of saran wrap under the shirt before allowing the child to squirt the dye on the segments of the shirt.  After each section has been dyed, wrap the saran wrap around the shirt and put it back in the ziplock bag.  Send the bag home with instructions for the parents on how to wash/care for the shirt.


Have so much fun seeing how everyone's shirts the following school day!

Toddler Masterpieces


Blue and purple have been the colors of choice at the art easel this month.  We mixed, swirled, splashed, and dabbed...


Toddler "E" even enjoyed the sensory experience of painting her hands.  The benefit of having a small group of friends is that there is time and space to do kid stuff... like paint yourself, and the teacher doesn't get stressed.


Paint washes off, but these experiences and memories will build the brain the child will have for a lifetime.  That is totally worth it.


Friday, July 3, 2020

Make Your Own Mermaid Cove


This has been a hot spot for play lately.  We provided a box with flat stones, natural seashells, blocks, ocean animals, and a variety of mermaids in shell seats.  The "water" was simply a blue and silver silky scarf tied around the table.


The children have set the stage, played, and reimagined stories and scenes over and over again.


Sometimes our mermaids befriended nice turtles and dolphins.


Sometimes the mermaids needed a spot to chill out and have a snack.  And sometimes they had to escape to safety from an invading shark or orca whale!


It's a beautiful thing to behold when young children develop creative thinking skills, scientific knowledge of living things, language, and role playing with a small box of simple toys.  <3

What's with the "Names?"

For new readers of the blog, this post is an explanation of the "names" Ms. Harmony uses when she writes about the school happe...

Read More!