Showing posts with label small group. Show all posts

Sunday, October 25, 2020

SPOOKY Science and Art!


Halloween season is such a fun time to sneak in amazing science opportunities.  This week we did some simple science as we pretended to be witches making potions!  Instead of dark cauldrons, I provided the children with clear jugs or bowls because I wanted them to see the chemical reactions and material densities easily.

The children were challenged to pick up fake creepy crawlies with tweezers.  We noticed that these buggers sank right to the bottom even if we stirred them up.  We described them as being heavier than the water.


We used spoons to try to pick up the bouncy ball eyeballs and discovered these would float even after being in the water for a long time and being pushed to the bottom.  We decided that they must be lighter than water.

What made this project extra fun was crumbling up Alka-selzer tablets and dropping them in the water to see the "brew" fizz and make tiny bubbles.

And, just because it's fun to be imaginative, we talked about what we would do with our potions if we were truly magical!  Would you want to make a growing potion???  Or turn into a frog???  What would you do if you could?

We also made magnificent masterpieces with paint, glitter, googly eyes, and yarn.

These are monsters you see, and every monster is different!  You can't do this art wrong.  :)


Our monsters each were wonderful in unique ways, and it was fun to think of ways to describe our own monster's colors, body shape, number or placements of eyes, personality, and hair style.  The final product will be displayed near the preschool entrance for parental viewing pleasure!

Thursday, October 15, 2020

Too Much Fall Fun, and NOT Enough Time!

Ms. Harmony loves all the fun changes that fall brings!  There is so much to do and enjoy! This post shares some of the ways we've been actively learning about fall.

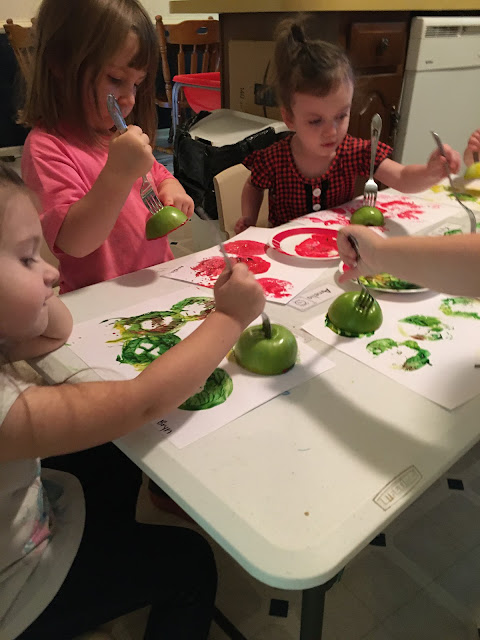
Apples are ripe and ready to eat!  We not only tasted apples, we learned about the parts of apples, and made beautiful apple prints.


We used scented rice, funnels, bottles, and acorn toys in the Explore Table.  This smelled amazing!


We built homes for fuzzy forest friends and made sure they had plenty to eat!  Fall is an important time for animals in the forest because soon they will face food and shelter scarcity during winter.


We colored leaf prints by taping the paper on top of the leaf and doing rubbings with crayon.


We cooked with acorns we gathered and sand.

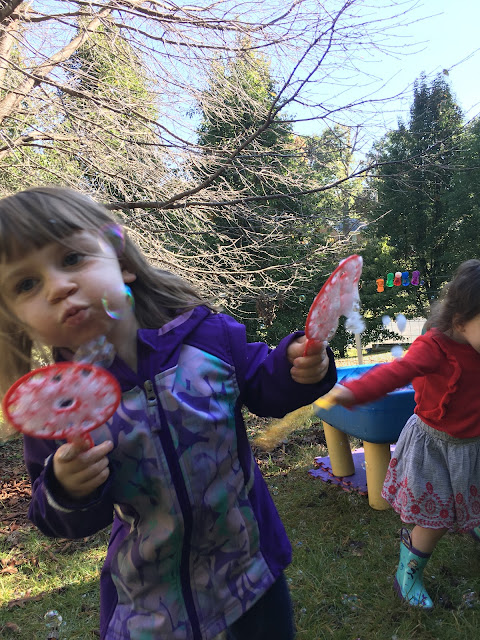
We noticed that the weather got cold, and so did the water in our table outside!  We changed the materials from water play to bubbles!


We shook up sensory bottles with googly eyes, bugs, and bands!


We made LOTS of art with play doh, googly eyes, paint, fuzzy sticks, pom-poms, stickers, and more!

We sorted bears into "families" which helped us practice color identification, size and color differences, and counting skills.

We applied our knowledge of fall leaves and forest animals by painting a forest scene in fall and telling a story about the animals that live there.  They were looking for food, building homes, getting camouflaged, etc.


We talked about Halloween being a fall holiday just weeks away!  We played with lots of funny things like slinkies, bracelets, pumpkins, and googly eye glasses!


We danced with fall leaves, tossed them in the air, and pretended to rake them into a pile!


It always seems like a race to do all the fun stuff each day.  I wish that the preschool hours could STRETCH out so we could pack more into the program... so I leave it with you at home to keep up the fall celebrations.  :)  

Monday, July 27, 2020

A-MUSE-ing Rocks


During July, we built on a student interest: rocks!  Each child at Harmony's House has a rock collection at home, so we brought that interest alive in the classroom as well.  One small group activity was to use magnifying glasses to study an assortment of rocks.


We talked about things that we noticed and recorded our observations for parents to appreciate.  Some of our rocks were geodes, cooling slowly after having lots of heat and pressure.  This made crystals form.  Some of our rocks were full of bubbles (holes), made by volcanoes.


Other rock samples were magnetic, and we found one other rock besides hematite that was also magnetic.  We found rocks that were flat (sandstone), rough (desert rose and scoria), and smooth (apache tears and agate).


Some of our rocks were special because they were fossils!  Fossils are rocks that are remnants of something that was once alive such as a plant or animal.  We know about dinosaurs because of fossils!  So we naturally played with dinosaurs too.


Our Explore Table was filled with kinetic sand, rocks, dinosaurs, and aquarium plants.  The wonderful thing about the kinetic sand was that it would show us how dinosaurs made tracks that could be preserved.  We could also pretend that a dinosaur was hatching from an egg.  Finally, we could bury a dinosaur and see how the body left prints behind.  Remnants of bones, eggs, tracks, and even dinosaur poop helps us learn about how dinosaurs lived long ago.


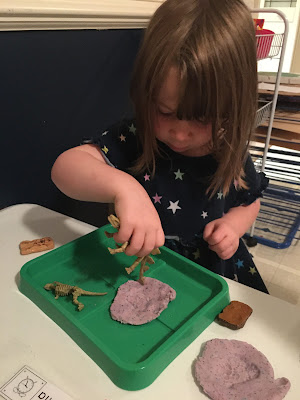
In the Art Area, we used toy dinosaur skeletons to again talk about fossils... but we also used them to see whether the dinosaur walked on two legs or four.  The prints turned out great!


No childhood can be considered complete without rocks and dinosaurs.  What a fun unit this has been for our miniature geologists!

Saturday, July 18, 2020

Tips for Tie-Dyeing with Preschoolers


Summer isn't summer at Harmony's House without making new tie-dye t-shirts.  :)  We did this project inside this year with four children ages 20 months to 3 1/2 years.  It sounds like a recipe for disaster, or at least a huge mess!  But it wasn't.  Ms. Harmony did a few things to prepare for the activity that made this potential mess into an easy-breezy-totally-fun project!


Tip 1:  cover the entire table with trash bags or cheap dollar tree table clothes, including using packing tape to close the seams of overlapping edges.

Tip 2: show the children options for the t-shirt designs in advance and ask them to choose one that they like: swirl, stripes, bulls-eye, etc.

Tip 3:  Prep the shirts according to the children's preference.  Do a cold rinse and spin in the washing machine.  Scrunch, roll, shape, etc. the shirt and apply the rubber bands.  Place the damp shirt in a small ziplock bag with the child's name on it.


Tip 4:  Choose three or four colors of dye and make them up before the activity.  Estimate the amount of dye you will need, but have an extra bottle or two on hand just in case you run out mid-project.

Tip 5: When leading the activity, only work on one shirt at a time.  Usually the other children enjoy watching the dyeing process, but they can go play elsewhere until it is their turn to dye their shirt.

Tip 6:  Lay a small sheet of saran wrap under the shirt before allowing the child to squirt the dye on the segments of the shirt.  After each section has been dyed, wrap the saran wrap around the shirt and put it back in the ziplock bag.  Send the bag home with instructions for the parents on how to wash/care for the shirt.


Have so much fun seeing how everyone's shirts the following school day!

What's with the "Names?"

For new readers of the blog, this post is an explanation of the "names" Ms. Harmony uses when she writes about the school happe...

Read More!